

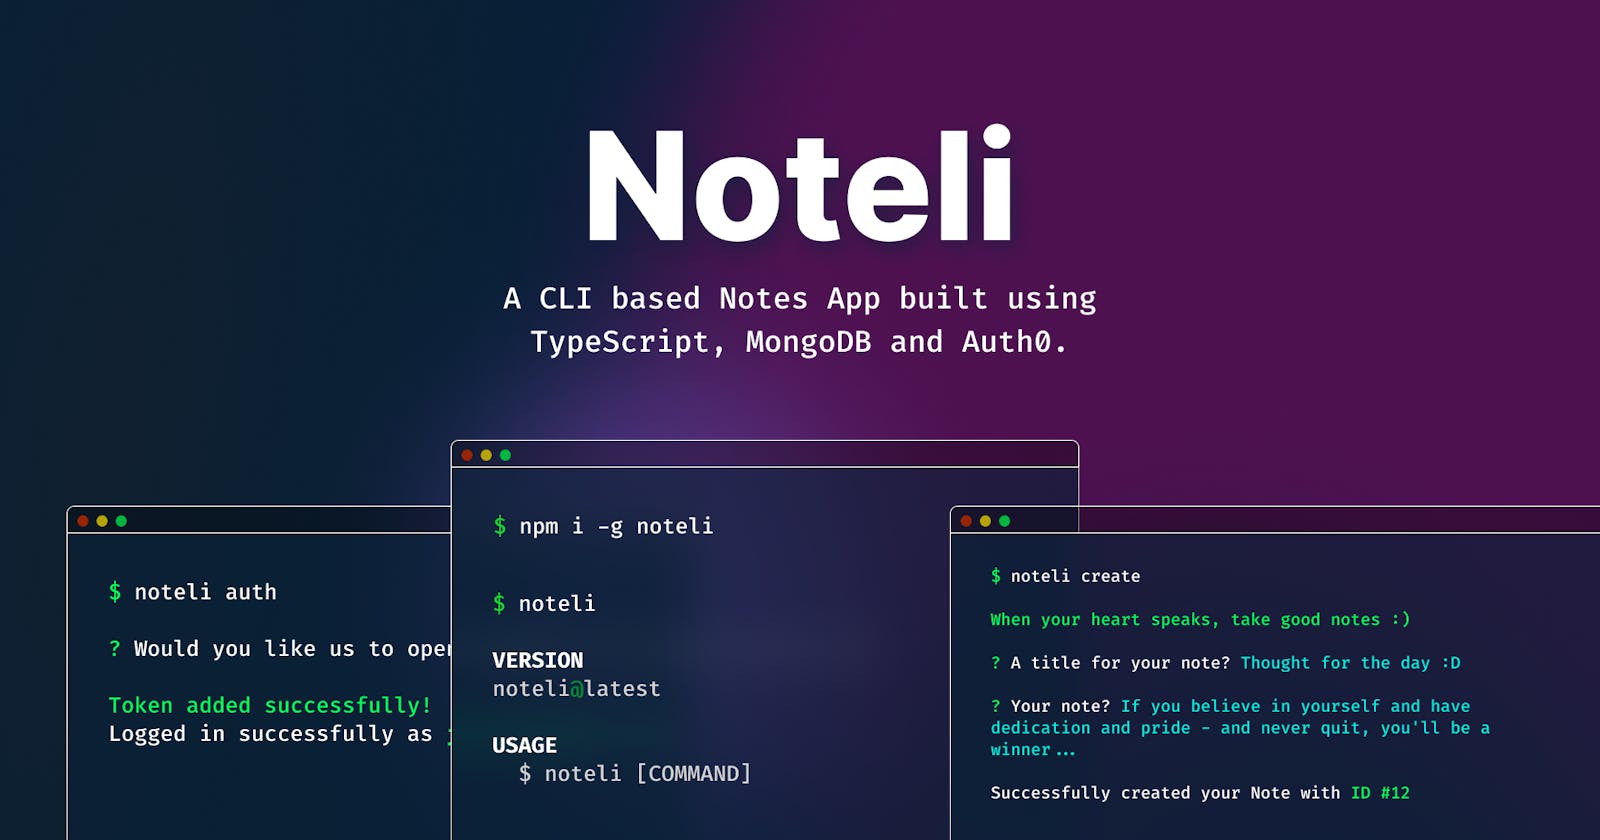
Introducing Noteli - The CLI Tool to Start Taking Notes with Auth0 Security🚀
Bored of taking notes the traditional way? Noteli to the rescue!


A bit about myself 🧑
Hey there👋 Myself Sahil and I am a Backend Developer, currently pursuing B. Tech in Computer Science. I have a good hold over developing APIs, Backend Systems, and DevOps. This is the very first time I'm participating in Hashnode x Auth0 hackathon for which I'm immensely excited to share this adventurous journey!

What is Noteli? 📝
Noteli is an Open Source CLI tool made especially for note-taking. Noteli is built using powers of TypeScript and security of Auth0 with MongoDB Cloud Database. There are tons of applications you can use to take notes! So what's so special with Noteli?
Walkthrough of Noteli 📽
Motive behind building Noteli 📈
We all know that many developers use CLI now and then. Be it Git, Heroku, or usual developer tasks, we use shell/terminal very often. Keeping this in mind, I thought of creating a CLI tool that would help developers to take notes quickly from the shell without wasting time through GUI :P
Inspiration for this CLI project 🙌
As I mentioned earlier, I'm a specialized Backend Developer and have very little to no knowledge of Frontend Frameworks like React.js or Vue.js! So I was a bit worried about what can I build for this Hackathon :( Additionally, I started very late, like 2 weeks back. So I had no way to participate in this hackathon. But then 1 fine day, a friend of mine in Hashnode Discord Server said he's building a CLI tool and using Auth0 to authorize users. At that moment I thought there might be a hope for me to make and submit something😄😄. Then I decided to build a CLI tool for note-taking which will help developers to take notes there and then :D
Journey of building Noteli 🛠

Before this, I never built a CLI tool in my entire life. So I gotta scratch my head through the Internet to find some good libraries which can help me achieve this in Node.js.
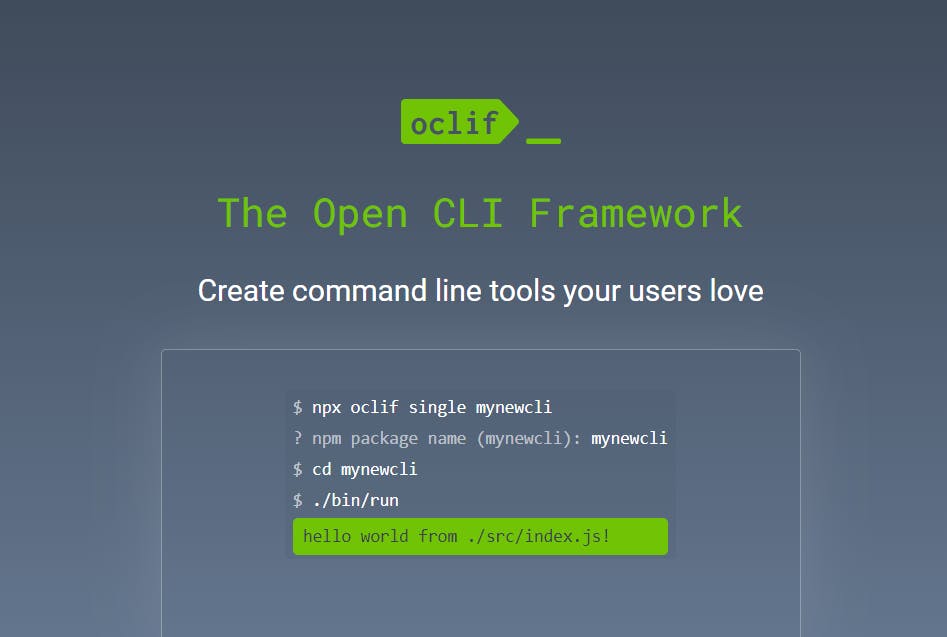
After long tiring research and using some of the libraries, I finally came across oclif library which is built by Heroku itself. Also, they use this library for their CLI along with Salesforce CLI!
How I built this? 👷♂️
Making a CLI wasn't that challenging but implementing Authentication in it was!
There were 0 resources on the internet about implementing OAuth in a CLI tool :( which made me sad for a while, but then I had to find some way out to solve this problem. After researching a lot and reading some docs, 1 idea hit my brain out of nowhere :D
Many developers would have used Heroku CLI sometimes to deploy their API/website to Heroku. There are 2 ways you can deploy an application - through Github and Heroku CLI. If we see, the CLI opens a browser for users to log in to their Heroku account and authorize the user to use CLI for deploying.
I thought what if I use the same technique to authorize users through Auth0 Social Login and store tokens on the user's computer. For this, I needed some library to open the Auth link in the browser. And tada! the open library came to my rescue!
open(authUrl); // opens auth URL in browser

// grabs access_token and get's user info based on it from Auth0
const access_token = response.data.token;

const user = await tokenConfig.getUser(access_token);

// here we set the token on user's computer
await tokenConfig.setToken(access_token, this.config.windows);
Using this library, the CLI would open the Auth link in the browser and authenticate a user using Auth0 and store the user's identity on their computer :D
Application Flow 🚀
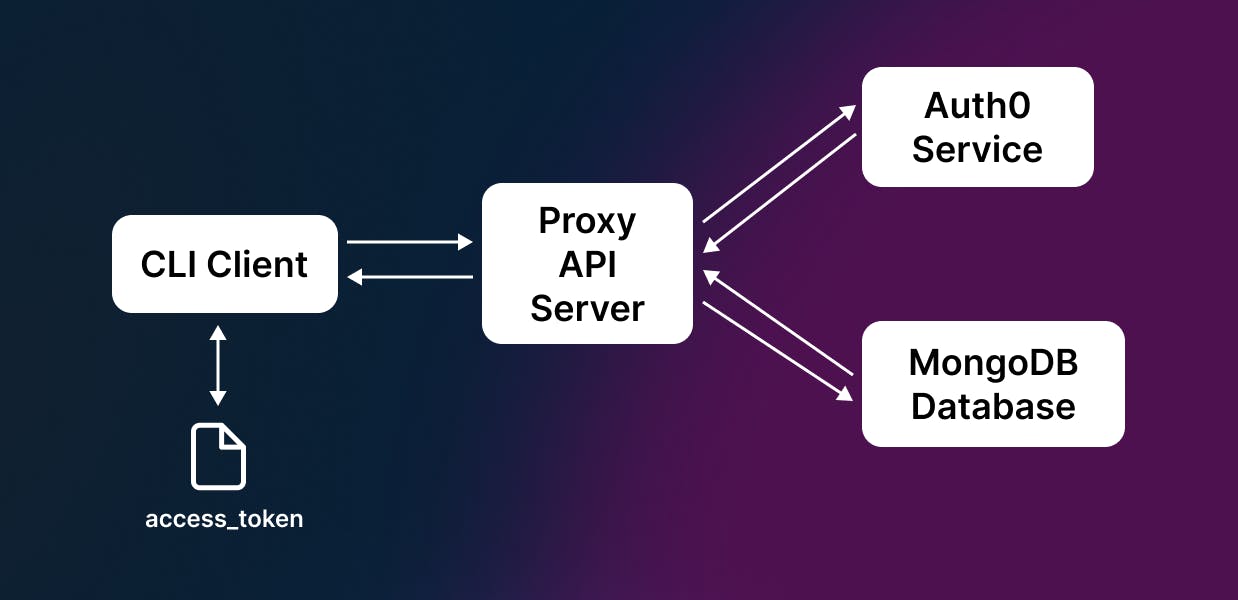
This application flow consists of many elements (CLI client, Proxy API Server, Auth0 service, and MongoDB)
The CLI doesn't directly interact with Auth0 APIs and MongoDB database. The request first goes to a Proxy API which then acts accordingly with those 2 services. This attempt is to add another level of security to the app.
The access_token is a hidden file containing a logged-in user's token, which gets passed to the API on every request.
The API then verifies the token with Auth0, if it's authorized to access the data. If true, then the user can perform actions, or else he might need to log in again to use the app!
Install the CLI💿
To use Noteli CLI , you need Node.js installed on your computer!
After installing Node.js, verify if it works fine using
$ node --versionand check if it returns a specific version. Then you're good to go!Now use this command to install Noteli through npm -
$ npm install -g noteliAfter installing it globally, just run this command
$ notelito confirm if noteli is installed or not
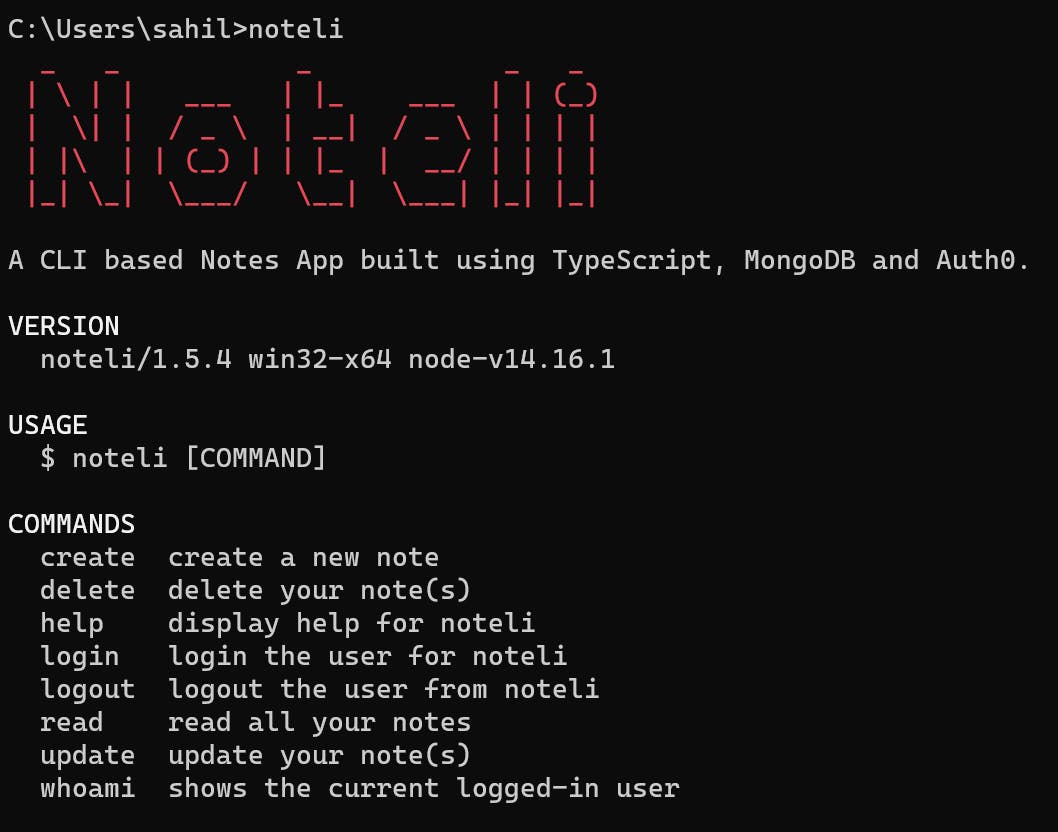
Woohoo, the CLI is installed 🎉🎉
Let's explore the CLI✨
- There are total 7 main commands and 1 help command which you can use and play with :D
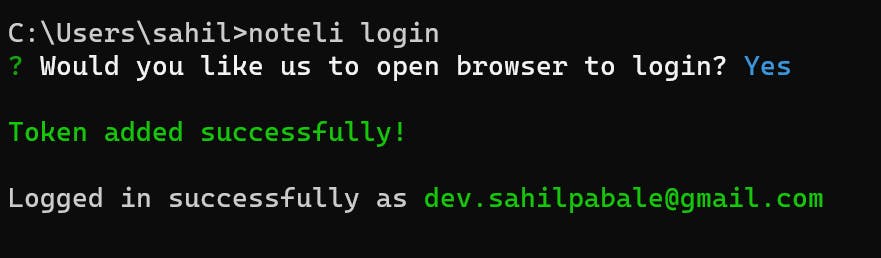
$ noteli login
This command will help you to log in and use the Noteli app without issues😄
$ noteli whoami
After logging in, you can check whether you're logged in properly or not :D

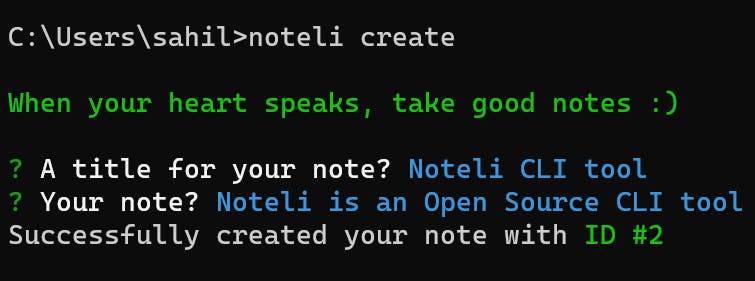
$ noteli create - Time to create some notes 😁😁
This will prompt you to enter a Title and your note's Content
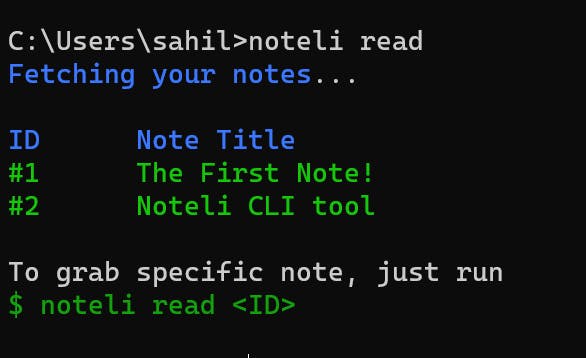
$ noteli read
This will fetch all your notes and display them to you in a tabular manner.
$ noteli read <ID>
To read any specific note, just give its ID as an argument and you can read it too!

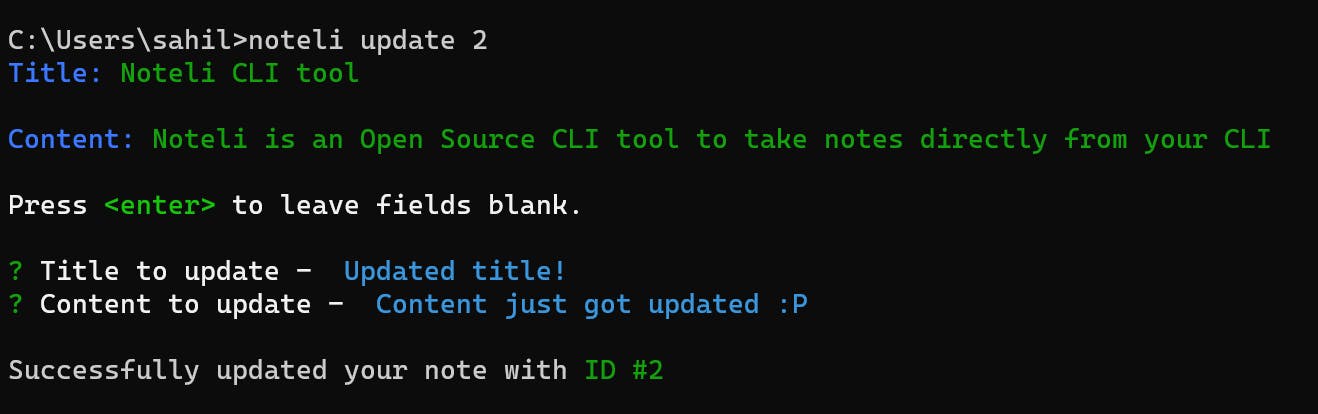
$ noteli update <ID>
What if something goes wrong? Don't worry, you can update your note using this!
$ noteli delete <ID>
Use this command carefully 🚨 to delete your note when you feel you don't need it :P

$ noteli logout
Finally, if you wish to log out, use this command. It will also revoke your token👋👋

Tech Stack 👨💻
- TypeScript
- Node.js - the environment for CLI and API
- Express.ts API - to build the Proxy API
- MongoDB Atlas - to store Users and Notes data
- Oclif and Inquirer - for creating the interactive CLI
- Auth0 - for auth services
- Microsoft Azure VM - for deploying the Proxy API
- Npm.js - to publish and distribute the CLI
Future developments 🔮
- I'm planning to add an
exportcommand, so user can export all their notes to a particular format! - In this world of Web 3.0, DApps is beneficial in every aspect, whether it is the security or scaling of the system. So I plan to make a decentralized version of the centralized server and database.
Source Code 👨💻
Noteli CLI Repo - github.com/sahilpabale/noteli
Noteli API Repo - github.com/sahilpabale/noteli-api
If you find any bugs or problems, feel free to create an issue or fork the repo to contribute😄😄
Donate 💲
If you really like what I have made then buy me a coffee!